How to Remove Wallpaper Like a Pro

Whether due to damage or simply to give your wall a fresh look, sooner or later, your wallpaper will have to come down.
For some, this is a DIY project, but you can always seek assistance from a painting and decorating company to undertake this work. After removing the wallpaper, you can seek services from these same professionals to paint the wall.
How to Remove Wallpaper - The Easy Approach
Removing wallpaper is far from an impossible task. A day or two is more than enough time, so that you can complete the job in a weekend all by yourself. However, there are some tactics that you need to follow to avoid damage to the wall.
1. Be mentally prepared

Removing wallpaper requires your undivided attention. Block out an entire weekend to do this task. Before starting, conduct a thorough research about how to remove wallpaper all by yourself; you will find plenty of resources all over the internet.
Start by identifying the type of wall and wallpaper on which you are going to work.
2. Protect your floors and other surfaces

Before you start, you have to protect your furniture, floors and the other surfaces of your house. When you starting of this project, things will be wet and sticky, so it’s important to stay careful.
You can tape plastic to your baseboard in a way that it overlaps the floor about 2 feet. Pressing the tape hard will create a watertight seal.
You cover the already taped plastic with more plastic. Be sure to keep a towel to absorb the water that comes down from the wall while working.
While working, it’s a good idea to turn off the electricity in the room. Doing so keeps you safe from unexpected accidents.
3. Pull the paper from the corner

You should start tearing off the paper near the ceiling at the edge of the wall or under a switch plate. This is the point where the paper remains loosest, so it’s much easier to tear from here.
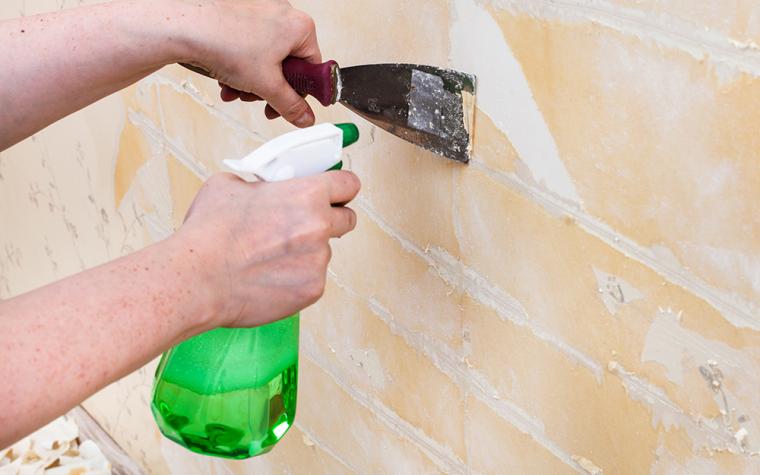
To ensure the task goes smoothly, you can always use a putty knife. A knife can be genuinely beneficial at this stage. You can pull the paper slowly by applying moderate pressure.
4. Apply hot water

You can apply water to the backing of the wallpaper using a floor mop and a sponge. This will ease the removal of wallpaper. By using the mop and sponge, you will be able to control the amount of water you are going to put on the wall.
After applying the water, wait for 15 minutes. This way, the backing and adhesive residue will soften slowly.
It is sometimes okay to moisten drywall, but don’t keep it like this for more than 15 minutes. This will dry the backing out. However, always remember keeping the wall moist for a long time will damage the drywall.
5. Remove the backing or adhesive residue

You can use the putty knife to peel off the wallpaper. A metal spatula can also do the job. These tools will allow you to remove the backing of the wallpaper so that the adhesive residue comes with it.
Don’t be too aggressive, however. If you do so, you’ll gouge the wall, and this could be very difficult to mend.
6. Repair the wall
While you will try your best to avoid damage to your wall, it can’t always be avoided. There will be times when you create unintentional damage. In such cases, you can patch any gouges in the wall with joint compound.
You can sand the wall to make rough or damaged areas smooth and ready for further painting. It’s recommended to use a hand sander and 120-grit drywall sanding paper.
Wrapping Up
Removing wallpaper can be an intimidating task. You can do it yourself, but you have to do it correctly so that you don’t end up making avoidable mistakes.
Alternatively, you can find competent painters and decorators to help you out, and make your home look just way you want it. If you want to know more about adding or removing wallpaper, contact a professional painting service provider for consultation.